Showing posts with label Food. Show all posts

Friday, 20 September 2013

SHTF / Survival at Home: Growing Your Food #4 ( Courgette / Zucchini )


The Courgette Plant or ''Zucchini'' as it is known in other countries from the Americas down to Australasia are a very easy to grow and maintain plant that provides a very reasonable amount of yield for it's grower/s, there are so many different methods to use the ''fruit'' in cooking such as stuffing, frying, stir fry, stews etc. You can even Deliciously Stuff the Flowers with cheese and fry them or just batter fry for a nice crunchy appetizer! They are a Summer Squash ...

Mature Zucchini / Courgette Plant - Back Garden / Survival SHTF
Plants come in different varieties that include Green as well as even Yellow fruit, and also round bell shaped varieties;

Harvested Yellow & Green Courgette Zucchini Fruits - home Grown
Round Varieties Zucchini / Courgette


I have not seen these plants being pre-grown in garden centers, I suppose this is because they are so easy to Germinate at home and take care of! They do not suffer from Aphid Infestations that I have ever seen, the biggest problem is probably *Powdery Mildew which is easily prevented and controlled by another Organic Home Made Recipe we will write on in the future.

What you must Obtain:
  • Seeds, preferably try more than one variety! In the South England Climate I feel 3 - 4 Plants is great for a couple with 1 - 2 Kids or even just a couple who eat a healthy amount of Vegetables, if you are a health Nut and make smoothies from vegetables, 3 or More plants may be needed!,
  • Glass Jar,
  • Small, Medium and Large Pot's or eliminate the need of the Large Pot if going to grow in a Prepared Bed,
  • Good Organic compost / mixture (click here for a great Organic Mixture great for most Veg's)
  • Natural Water Source (try collect rainwater if it's not Illegal like in some states in the USA!) << Crazy, I know! but True
  • Support Sticks / Bamboo Canes may be needed as these plants can sometimes be affected by strong winds and also the fruits get heavy, sometimes sagging the plant
Method:

  • Place the required amount of seeds in the glass jar and fill half the jar with water, cover and let sit overnight (about 24 hours),
  • Drain water, rinse again, Drain the rinsing water but make sure the seeds are still nice and moist, cover jar mouth and place back into a warm coupboard ,
  • Take a look, if the root is coming out you can then place each seed sideways about 2-3cm (1 inch +-) under your compost in their own individual small pots and keep moist, (if no roots seen then rinse again and make sure they are left with some good moisture),
  • Keep pots on a warm windowsill or greenhouse & Keep moist!, if it is really hot and you think the pot may be exposed to quite a few hours of direct sunlight you may want to find another area or cover the pot with paper so not all the sun heats the soil too much which could almost effectively kill the seed/s,
  • After a few days the first leaves will appear, sigh of relief that now you have a plant which can survive stronger sunlight as long as you keep watering!, keep on windowsill / greenhouse until you have at least 3 or so True ''Leaves'',
  • When the plant looks slightly too big for the small pot, it's probably time to move into a medium pot or you could even go directly into the Large Pot if the plant is destined to remain in a pot,
  • Once the Plant is at least 30cm (11 Inches) tall and your Area's ''Last Frost Date'' has passed, you can plant outside or in your Pots outside, if you have a greenhouse the plant should do okay at that point even if cold outside at night,
  • Start feeding with a good Liquid feed high in Nitrogen, try keep away from chemical fertilisers but The higher nitrogen the better - if you can get 11 - 19% that's great!,
  • When the plant is quite mature and producing loads of fruit, move onto a high Potash Fertilizer with now lower Nitrogen (I use  4% Nitrogen 8% Potash Mix),
  • Look out for White Substance forming on the leaves, this will be powdery mildew, its not bad but just makes Photosynthesis less possible therefore less fruit yield - search online for the prevention and control, we will be loading an article about this in the future!
  • They may be targeted by slugs, Beertraps work well but if you can, try not to use Beertraps as they also kill Beneficial Insects too!
  • The Plants have a female flower and male flower, the male is on a long stem and female short thick stem (the stem is the baby courgette / zucchini) after pollen from the male is added to the receptacle of the female, then the flower should die off and the Fruit develops - Bees are natural pollinators and having beneficial flowers and plants in your garden will attract the bees to pollinate your flowers, you can also hand pollinate (Watch below video for hand pollinating)


Harvesting:
You can cut the fruits when about 10-15 cm (3.15 - 5.29 Inches) Long for better taste (better for Steam Cooking / Frying) or 30+ cm (11.3 Inches +) when they are more like a Marrow size, stil great for Frying, Stuffing, Stews, Soups and Smoothies!
Remember,  the more you harvest, the more you are diverting the nutrients from that fruits stem to the other smaller fruits, they will grow quicker and more nutrients will go to more fruit production - ie: The more you pick, the more will grow!

Grilled Zucchini / Courgette
Courgette / Zucchini Soup


Video: 
Shows how Large They can grow and How To Keep the seeds for next year's planting!

Click Link: http://youtu.be/4HdarkxWwz4

DIY How To Prepare a good Organic Nutrient Compost mix for your Vegetable / Fruit Garden INCLUDING Calcium Supplement

Here we have a very basic ORGANIC Nutrient / Compost mix that should provide all of your plants with the minerals, nutrients they require either in their pots or outdoor beds, remember though, it is still recommended to Liquid Feed your plants regularly, but the best you can do for your plants is the Soil, don't be that average Joe who just buys a good compost and expects a Great Yield!

Instructional Video - Includes Equipment / Materials list and so on:


If you have suddenly decided to start Growing Your Own Vegetables and Food / Fruits, whether you are a Prepper or SHTF Concerned Survivalist, or just someone fed up with what they put in our foods such as GMO Crops (Genetically Modified Organisms) << Keep Away from These! Trust Me!, MSG Preservatives etc. You can actually get some of your Veg / Fruit Crops from your local Large Garden Center (pre-grown) as an interim Solution while you obtain *Heirloom Seeds and Germinate them, As you can see in the below Post on Planting Bell Peppers Outdoors, we explain how we obtained a few plants at End Of Season Discount price, these plants actually had medium sized fruits on them, they were bought because we had difficulty Germinating Peppers this year and these were fully grown plants, we didn't need anything else as we already have many different veg's growing well from seed since the beginning of the season.

Wednesday, 14 August 2013

Growing Your Own Food (SHTF / Survival) Thumbnail Page

Click on the Image to then jump to the related Article


Potato Growing at Home SHTF / survival
Tomato Growing at Home SHTF / survival
DIY Pot Modification for Deep Root Veg's
 
Next Update = Courgettes / Zucchinis


Organic DIY Calcium Supplement for Vegetables
Pepper Plants Growing at Home SHTF / survival


SHTF / Survival Growing Your Food At Home #2 ( Tomatoes )

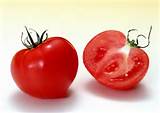
Tomato Plants come in many different varieties from ones that are small and bushy which are perfect for pot growing, Plum / Cherry tomatoes that are great for salads etc., to the Beefsteak varieties which are large bushes suited better for outdoor garden / plot growing & produce big tomatoes.
Either way, Tomato plants produce a lot of fruit which is also easy to preserve (canning) for long term storage (up to 2 years of done correctly) , you can make Tomato Sauce ( Ketchup ), Soups with very ripe tomatoes etc! Tomato plants also have fewer pests than other vegetables and fruits (depending on your country).

Purchase Organic Non-GMO tomato seeds and I would recommend you get 3-4 different varieties, a good pot tomato (Such as the Minibel Variety) would be great to put as an upside down hanging plant (I will post an article on those soon and include the link here) so if you have limited ground space at home you can always drill a few holes and put up a hanging bracket on a good wall which gets loads of sunlight!

You will need:
  1. A few packs of different varieties of Organic Non-GMO seeds,
  2. Good pack of Compost or potting soil (peat free),
  3. Calcium or finely crushed egg shells,
  4. Seed tray or reused small yogurt containers etc,
  5. 500 ml water bottles cut in half (keep tops and bottoms)
  6. Small, Medium and Large Plastic or any material Pots,
  7. Water Source,
  8. Plant Feed (Preferably tomato feed and get a non chemical one if possible)
  9. Watering Can,
  10. Bamboo Sticks, Stake  or an actual Support Cage.
Tomato Cages in a Raised Veg Bed
 Steps:
  1. Place the desired amount of seeds in a small tub of water and leave overnight (this greatly reduces the germination time),
  2. Fill the small containers / seed tray with compost and using a pencil or your finger, make a small hole about 1 - 1.5cm deep - lie seed sideways in hole,
  3. Cover with more compost so hole is filled, now water well.
  4. Place one of the half cut water bottles so the cut side is resting on the compost and providing a teepee like shelter to the area above the seed (this provides extra warmth and prevents water evaporation),
  5. Keep on a warm windowsill and in a few days the seedlings will emerge,
  6. Once the seedlings are about 3 - 5cm tall you can transplant them into the prepared small plastic pots or you can actually jump straight into a medium pot if you have an abundance of compost,
  7. To transplant just squeeze the sides of the small container / seed tray and there should be no trouble if the compost is nice and moist, you can gently pull the seedling but if you are a beginner I would turn the pot on the side / slightly upside down to let gravity bring it down, now dig a hole big enough to place the seedling with the soil around the roots inside the new pot,
  8. Allow to grow and give good sunlight and water,
  9. Once you see roots coming out the drainage holes at the bottom of the chosen pots, it is time to move into a larger pot or into the ground space that is prepared (Dig hole and place a hand full of calcium or the 3-5x finely crushed egg shells in the bottom)
  10. Cut off the small ''first leaves'' (see small leaves in below plant diagram) and put plant deep enough inside new pot / bed to cover the cut leaves so that the soil level is now sitting an inch below the lower ''true leaves'' (The plant will be okay and it will actually spurt new roots from buried shoot / stem)
  11. Before the roots grow too much, it is time now to place the cage, stake or bamboo supports around the plant (these will support the plant and its branches which sag when the fruit gets heavy)
  12. Water the plant more regularly if it is in pots (you may need to water twice a day if it's a very hot day for the pot plants) water 1 - 2 times per week if it's in the ground,
  13. Feed Once a week with tomato or other vegetable type feed (follow pack instructions)
  14. Prune some leaves once in a while when the plant gets bushy, especially the bottom set as they are closer to the soil level and can get diseases from the splashing when watering - these will normally be the first to change colour etc.
Tomato Plant Diagram

Look out for future posts such as: Canning / Preserving your vegetables & Hanging Vegetable Garden / Plants!

Monday, 5 August 2013

SHTF / Survival at Home: Growing Your Food #1 (Potatoes)

Learning how to be self sufficient in Food Supply is highly important in learning true survival, practicing this at home weather you are an actual Prepper, or just an individual needing to save some money is good training in case of an actual event.

Many people are put off of vegetable or fruit growing due to lack of time (watering and taking care of their plants). Regular watering is really only necessary if you plant mostly in pots as pots dry out far quicker than a vegetable bed / patch, plus with the use of Mulch, you can help retain the moisture in your pots for longer but the truth is, like most of you, I myself was also put off of constant watering and taking care of the plants, until I started growing them, as it is a step by step process you really do become a lot more interested and at some point you start spending loads of time doing the general work on your crops. It became a new interest but for those who are already living the busy life just watering, harvesting and feeding can be done with minimal time as long as you stick to a schedule.

Potatoes
What's Needed: 
  1. Large Pot/s or Bucket/s,
  2. A few Non GMO Potatoes that are starting to sprout (refer to below picture),
  3. Compost, Soil or a 50/50 mixture of both,
  4. A Liquid Vegetable plant feed (Preferably non chemical)
I really had no intention on planting potatoes this year but noticed some growth sprouts on one of my potatoes which was due to be turned into mash and quickly remembered my aunt claiming that you can grow from skins - so I decided to do a little internet surfing and confirmed it to be true. 
I then went and sliced the piece off just under the growth in the three places on the potato where the eyes were sprouting (cut off a little more, not right under the spurt / eye).

Survival / SHTF Growing your own food: Potatoes

Let the pieces dry out for about 12 hours, take a large plastic pot and fill it 1/6 with compost or soil or a mixture of both. plant 2 - 3 of them in the bottom and cover with an inch or two of the soil / compost, water regularly and be patient while the root system establishes! If you have a greenhouse it can remain in there until the plant really takes off. When the stems grow you pour enough soil / compost in to cover the bottom of the new stem but make sure to keep the top leaves open (You may cover leaves that are further down the stem) Keep adding soil / compost as the plants grow taller and until the pot / bucket is full! If you are content with the size of the bucket or pot then just wait until the flowers die off and the plants wilt, that is the sign that you can tip the pot and dig out the potatoes.

This can be done in those large 220LTR (55 Gallon) Oil Barrels as shown in the below youtube video:


Liquid feed is important as well, I can recommend using a liquid feed at least once a week on your plants.
Did you know that it is recommended to first initiate a vegetable patch in your garden with potatoes? You grow potatoes in that patch the first year then the next you can plant various different crops, this however is just a recommendation, not a must.

Growing Your Food #2 coming soon ...