Rimfire Blog International & UK
everything from .22LR through to the .22WMR and .17HMR! Beginners, Professionals, Enthusiasts ... it's all here growing steadily
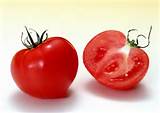
Tomato Plants come in many different varieties from ones that are small and bushy which are perfect for pot growing, Plum / Cherry tomatoes that are great for salads etc., to the Beefsteak varieties which are large bushes suited better for outdoor garden / plot growing & produce big tomatoes.
Either way, Tomato plants produce a lot of fruit which is also easy to preserve (canning) for long term storage (up to 2 years of done correctly) , you can make Tomato Sauce ( Ketchup ), Soups with very ripe tomatoes etc! Tomato plants also have fewer pests than other vegetables and fruits (depending on your country).
Purchase Organic Non-GMO tomato seeds and I would recommend you get 3-4 different varieties, a good pot tomato (Such as the Minibel Variety) would be great to put as an upside down hanging plant (I will post an article on those soon and include the link here) so if you have limited ground space at home you can always drill a few holes and put up a hanging bracket on a good wall which gets loads of sunlight!
You will need:
A few packs of different varieties of Organic Non-GMO seeds,
Good pack of Compost or potting soil (peat free),
Calcium or finely crushed egg shells,
Seed tray or reused small yogurt containers etc,
500 ml water bottles cut in half (keep tops and bottoms)
Small, Medium and Large Plastic or any material Pots,
Water Source,
Plant Feed (Preferably tomato feed and get a non chemical one if possible)
Watering Can,
Bamboo Sticks, Stake or an actual Support Cage.
Tomato Cages in a Raised Veg Bed
Steps:
Place the desired amount of seeds in a small tub of water and leave overnight (this greatly reduces the germination time),
Fill the small containers / seed tray with compost and using a pencil or your finger, make a small hole about 1 - 1.5cm deep - lie seed sideways in hole,
Cover with more compost so hole is filled, now water well.
Place one of the half cut water bottles so the cut side is resting on the compost and providing a teepee like shelter to the area above the seed (this provides extra warmth and prevents water evaporation),
Keep on a warm windowsill and in a few days the seedlings will emerge,
Once the seedlings are about 3 - 5cm tall you can transplant them into the prepared small plastic pots or you can actually jump straight into a medium pot if you have an abundance of compost,
To transplant just squeeze the sides of the small container / seed tray and there should be no trouble if the compost is nice and moist, you can gently pull the seedling but if you are a beginner I would turn the pot on the side / slightly upside down to let gravity bring it down, now dig a hole big enough to place the seedling with the soil around the roots inside the new pot,
Allow to grow and give good sunlight and water,
Once you see roots coming out the drainage holes at the bottom of the chosen pots, it is time to move into a larger pot or into the ground space that is prepared (Dig hole and place a hand full of calcium or the 3-5x finely crushed egg shells in the bottom)
Cut off the small ''first leaves'' (see small leaves in below plant diagram) and put plant deep enough inside new pot / bed to cover the cut leaves so that the soil level is now sitting an inch below the lower ''true leaves'' (The plant will be okay and it will actually spurt new roots from buried shoot / stem)
Before the roots grow too much, it is time now to place the cage, stake or bamboo supports around the plant (these will support the plant and its branches which sag when the fruit gets heavy)
Water the plant more regularly if it is in pots (you may need to water twice a day if it's a very hot day for the pot plants) water 1 - 2 times per week if it's in the ground,
Feed Once a week with tomato or other vegetable type feed (follow pack instructions)
Prune some leaves once in a while when the plant gets bushy, especially the bottom set as they are closer to the soil level and can get diseases from the splashing when watering - these will normally be the first to change colour etc.
Tomato Plant Diagram
Look out for future posts such as: Canning / Preserving your vegetables & Hanging Vegetable Garden / Plants!
In 1987, the Intifada – the Palestinian uprising against the Israeli regime in the Occupied Territories – broke out, and involved mass violent clashes between Israeli security forces and Palestinians protestors. As a result, the Israeli security forces needed a weapon with a more potent firepower then the standard riot control metal covered rubber round, but at the same time less lethal then the standard issue 5.56 mm round of the M16/Galil assault rifles. So the Israeli Defense Force (IDF) searched for a 0.22 caliber accurate rifle that will be used to take out the key protest leaders by shooting them in the legs.
Isreili IDF soldier using a Ruger 10/22
The Ruger 10/22, fitted with a X4 day optic, a full length suppressor and a Harris bipod was selected for this role and was due to be issued to all infantry oriented units, including both special and conventional forces. However, as often happens in the shoestring budget IDF, financial problems prevented the weapon’s mass distribution, and it was mainly issued to Special Forces (SF) units. Moreover, instead of using the rifle as a riot control weapon, as originally intended, the Israeli SF deployed the Ruger 10/22 more as a “Hush Puppy” weapon used to silently and effectively eliminate disturbing dogs prior to operations.
In the recent Israeli-Palestinian clashes began in 2000, the Ruger resumes it’s original role as a less lethal riot control weapon. However, it’s usage in this role was rather controversial this time. After several incidents involving the death of Palestinians by the Ruger fire, the IDF conducted a field experiment in the Ruger at the IDF Sniper School in Mitkan Adam under the supervision of the IDF Judge Advocate General (JAG). The test showed that the Ruger was more lethal then thought especially in upper body injuries. Also, since it’s suppressed and was considered less lethal by the troops, the soldiers were much more likely to use the Ruger loosely then intended.
Isreili IDF Soldier with Ruger 10/22 Anti Protest
As a result of this test, the JAG reclassified the Ruger as a lethal weapon. As a lethal weapon, the usage of the Ruger in riot control is much more limited today. In the IDF Center Command it was completely prohibited to use and the IDF South Command it’s deployment was cut down dramatically.
Learning how to be self sufficient in Food Supply is highly important in learning true survival, practicing this at home weather you are an actual Prepper, or just an individual needing to save some money is good training in case of an actual event.
Many people are put off of vegetable or fruit growing due to lack of time (watering and taking care of their plants). Regular watering is really only necessary if you plant mostly in pots as pots dry out far quicker than a vegetable bed / patch, plus with the use of Mulch, you can help retain the moisture in your pots for longer but the truth is, like most of you, I myself was also put off of constant watering and taking care of the plants, until I started growing them, as it is a step by step process you really do become a lot more interested and at some point you start spending loads of time doing the general work on your crops. It became a new interest but for those who are already living the busy life just watering, harvesting and feeding can be done with minimal time as long as you stick to a schedule.
Potatoes
What's Needed:
Large Pot/s or Bucket/s,
A few Non GMO Potatoes that are starting to sprout (refer to below picture),
Compost, Soil or a 50/50 mixture of both,
A Liquid Vegetable plant feed (Preferably non chemical)
I really had no intention on planting potatoes this year but noticed some growth sprouts on one of my potatoes which was due to be turned into mash and quickly remembered my aunt claiming that you can grow from skins - so I decided to do a little internet surfing and confirmed it to be true.
I then went and sliced the piece off just under the growth in the three places on the potato where the eyes were sprouting (cut off a little more, not right under the spurt / eye).
Survival / SHTF Growing your own food: Potatoes
Let the pieces dry out for about 12 hours, take a large plastic pot and fill it 1/6 with compost or soil or a mixture of both. plant 2 - 3 of them in the bottom and cover with an inch or two of the soil / compost, water regularly and be patient while the root system establishes! If you have a greenhouse it can remain in there until the plant really takes off. When the stems grow you pour enough soil / compost in to cover the bottom of the new stem but make sure to keep the top leaves open (You may cover leaves that are further down the stem) Keep adding soil / compost as the plants grow taller and until the pot / bucket is full! If you are content with the size of the bucket or pot then just wait until the flowers die off and the plants wilt, that is the sign that you can tip the pot and dig out the potatoes.
This can be done in those large 220LTR (55 Gallon) Oil Barrels as shown in the below youtube video:
Liquid feed is important as well, I can recommend using a liquid feed at least once a week on your plants.
Did you know that it is recommended to first initiate a vegetable patch in your garden with potatoes? You grow potatoes in that patch the first year then the next you can plant various different crops, this however is just a recommendation, not a must.


.jpg)

.jpg)
.jpg)
.jpg)


